Kinetic Blast Elementalist Build
A Kinetic Blast build for Elementalist with excellent clear speed and high elemental damage, making it a perfect StarterKinetic Blast
Elementalist/Lycia Bloodline Build
Updated for Patch 3.27
The Best Crafty Guides by Odealo
| Guide notes |
| November 3, 2025 -Build created |
| Build Overview | |||
| Tags: [ELEMENTAL] [RANGED] [LIFE] | |||
|
Budget: Defenses: |
|
Boss DPS: AoE: |
|
Kinetic Blast is a Wand Attack that fires a Projectile, which explodes with each collision. It's one of the most popular Skills for this type of build, as it's very simple to assemble. This Projectile Attack will deal Elemental Damage, sourced mostly from a Wand, which is then improved with Spell Damage, as Kinetic Blast is one of the few Attacks that are affected by increases to Spell Damage, with double the efficiency at that. This archetype is supported by numerous passives on the skill tree, such as Elder Power, Prism Weave, or Wandslinger. It'll also be very easy to cap Crit Chance at 100%, to then benefit from a high Crit Multiplier that at least quintuples the DPS. Another tacit virtue of Kinetic Blast is its ability to Shotgun. The explosion, occurring each time the Projectile Forks, Chain, Splits, or Pierces, can affect the same enemy even if caused by Projectiles from the same Attack. To do that reliably on bosses, we will include Orb-type Skills that can be Hit by our character - Tornado and Hydrosphere. These will be linked with Spellslinger.
We have picked Elementalist because of its Ascendancy Passives - Liege of the Primordial, which re-summons Golems, increases the maximum number of them, and their Buff effect, Shaper of Storms to inflict powerful Shocks, and Bringer of Ruin to improve Herald Skills. Herald of Thunder and Herald of Ice deal damage that is also affected by modifiers to Spell Damage, so they'll be quite strong, although Bringer of Ruin can be replaced with Shaper of Winter if you can withstand the Reservation Cost. The 3.27 patch introduced Bloodline Ascendancies; we can pick Lycia's Farewell to Flesh for increased Herald's Buff Effect. That results in added Cold and Lightning Damage to Attacks.
Defensively, you'll rely on high Life and ES pool with low Block Chance, Spell Suppression, and very high Recovery of all resources. KB, after some tinkering, has one of the highest hit rates, meaning that with the inclusion of just one modifier for Life, ES, and Mana on Hit, the character won't run out of any of them. Combine it with Leech, instant Leech (which can be boosted with Ghost Reaver), and Regeneration from Stone Golem. It is still vulnerable to Physical Damage.
You can also check our other Path of Exile builds right over here Odealo's Crafty Guides - Full List
1. Gameplay
It's a one-and-a-half-button build. Kinetic Blast is the all-purpose tool that not only deals damage, but also slings Tornado, Hydrosphere, and inflicts Sniper's Mark. Golems are re-summoned automatically. Wrath, Herald of Ice, and Herald of Thunder are passive skills. Remember to activate Blood Rage as you enter a map, and use Shield Charge to move around. Frostblink is for emergencies.
|
|

2. Build's PROS & CONS
| PROS |
|
| CONS |
|
3. Leveling tips
Start with KB, Flame Wall, and Holy Flame Totems. These skills are available in Act 1. You may add to that Herald of Thunder and Skitterbots. Liege of the Primordial is your first Ascendancy passive, so get four Golems as soon as Act 4. Link KB with added Lightning Damage Support instead of Increased Critical Damage, as your Crit Chance will be low early on. Wall of Force and Precision should be added later. Wave of Conviction is a good source of Exposure before you can afford to sling Hydrosphere.
Bandits:
You should kill all three Bandits for two additional Skill Points. Ailra can be great too if you struggle with Elemental Resistances.
4. Final Skill Tree, Ascendancy Points, and Pantheon
Final Skill Tree:
108 Points Final Skill Tree (doesn't include Unique or Cluster Jewels)
123 Points Path of Building (PoB) link
Ascendancy points:
Preferably in that order:
- Liege of the Primordial
- Shaper of Storms
- Bringer of Ruin (or Shaper of Winter)
- Farewell to Flesh (Lycia Bloodline)
Pantheon:
Major God: Soul of Lunaris: 1% increased Movement Speed for each nearby Enemy, up to 8%; 1% additional Physical Damage Reduction for each nearby Enemy, up to 8%
Minor God: Soul of Tukohama: 3% additional Physical Damage Reduction per second you've been stationary, up to a maximum of 9%
5. Final Gems links
| [DPS] Kinetic Blast setup | |
 |
Kinetic Blast - A basic Wand Attack. Increases to Spell Damage will increase its damage at 200% of the original value, despite it being an attack. Projectiles explode on hit. |
 |
Sacred Wisps Support - Summons 2 Wisps, which have a chance to fire this Kinetic Blast setup; each deals half its damage. |
 |
Fork Support - Projectiles Fork. It massively increases your clear speed and damage, as KB explodes on every interaction with an enemy or terrain. |
 |
Trinity Support - Creates Resonance if you deal varied types of Elemental Damage. It grants Elemental Damage and Elemental penetration. |
 |
Increased Critical Damage Support - Critical Strikes deal more damage. |
 |
Elemental Damage with Attacks Support - More Elemental Damage with Attacks. |
| [UTILITY] Reservation setup | |
 |
Wrath - More Spell damage and Added Lightning Damage to Attacks. |
 |
Herald of Thunder - Creates Storms when you kill a Shocked enemy. They deal Lightning Damage, and it can be increased with Spell Damage. |
 |
Herald of Ice - Allows you to Shatter Frozen enemies, so that they deal Cold Damage around them. It also scales with increases to Spell Damage. |
 |
Enlighten Support - Linked Spells Reserve less Mana. |
| [UTILITY] Golems | |
 |
Summon Flame Golem - Flame Golem increases your Damage. |
 |
Summon Ice Golem - Ice Golem increases Critical Strike Chance and adds Accuracy. |
 |
Summon Stone Golem - Stone Golem Regenerates Life over time. |
 |
Summon Lightning Golem - Lightning Golem Regenerates Mana over time and increases Attack and Cast Speed. |
| [UTILITY] Spellslinger setup | |
 |
Spellslinger - Linked Spells are triggered on Hit. It Reserves more Mana the more complex the setup is, so we have to be concise with it. |
 |
Hydrosphere - Projectiles can collide with it. It inflicts Cold and Lightning Exposure on nearby enemies. |
 |
Tornado - Projectiles can collide with it as well. It deals insignificant damage. |
| [UTILITY] Mark setup | |
 |
Sniper's Mark - Marked enemy takes increased damage from Projectiles, which Split on impact. |
 |
Mark on Hit Support - Linked Mark is applied automatically on Hit against Rare and Unique enemies. |
 |
Lifetap Support - Linked Skills cost Life instead of Mana. |
| [MOBILITY] Frostblink | |
 |
Frostblink - Teleport to the targeted location. It Chills enemies and creates Chilled Ground. |
| [UTILITY] Blood Rage | |
 |
Blood Rage - Increased Attack Speed and Frenzy Charges on Kill. It drains Life, but the Stone Golem will get it back. |
| [MOBILITY] Shield Charge setup | |
 |
Shield Charge - A Movement Attack that you can use with Shield. It should be very effective with your high Attack Speed. |
 |
Faster Attacks Support - Increases the Attack Speed of Shield Charge to move even faster. |
|
|
6. Gear Setup
This Wand build is one of the simplest ones you can find. It can be assembled only using Rare Items, but the overabundance of great Uniques for all stages of its development shall persuade you to weave at least some into it. It requires high Added Elemental Damage, which is plentiful on a Wand, but can be found on many other items. You will need different types of Elemental Damage to activate Trinity's Resonance. KB will benefit from Spell Damage, so get it too. Then, you can shift focus to reaching 100% Crit Chance and gathering Crit Multiplier (Global or for Attacks). Defensively, it relies on rapid Recovery via Life/ES on Hit and Leech. Maximum Life and Energy Shield make your Life Pool. Remember to get the required Accuracy, Attributes, and Resistances.
Our recommended items will:
- Cap your resistances at 75%
- Provide you with enough DPS and Life to start mapping
|
Stat priorities on items:
|
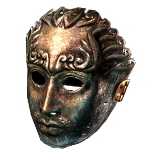 (Helmet) Rare Helmet - On a Helmet, you can find only the most basic Life, Resistances, and Attributes. Accuracy should be easy to access if needed. For the Eldritch Mods, go for reduced Mana Cost of Attacks and Reservation Efficiency. (Helmet) Rare Helmet - On a Helmet, you can find only the most basic Life, Resistances, and Attributes. Accuracy should be easy to access if needed. For the Eldritch Mods, go for reduced Mana Cost of Attacks and Reservation Efficiency. |
|
| Min. requirements: +90 to Maximum Life +40% to Elemental Resistances Optional affixes: Accuracy Rating Chaos Resistance Maximum Energy Shield Chance to Suppress Spell Damage |
|
 (Weapon) Rare Wand - A Wand must have high Elemental Damage via "added Cold/Fire/Lightning Damage to Attacks" and high Attack Speed. Spell Damage will be good, and Critical Strike Multiplier (Global, not for Spells) should be present too at some point. (Weapon) Rare Wand - A Wand must have high Elemental Damage via "added Cold/Fire/Lightning Damage to Attacks" and high Attack Speed. Spell Damage will be good, and Critical Strike Multiplier (Global, not for Spells) should be present too at some point. |
|
| Min. requirements: high Elemental DPS Optional affixes: increased Critical Strike Chance Global Critical Strike Multiplier increased Spell Damage Attacks with this Weapon Penetrate #% Elemental Resistances (Hunter/Veiled/crafted) |
|
 (Off-hand) Rare Shield - Look for Block Chance, Resistances, and Maximum Life. ES Shield may get you some increased Spell Damage. Other Shields can roll Accuracy and Attack Speed, maybe even Reduced Physical Damage taken. (Off-hand) Rare Shield - Look for Block Chance, Resistances, and Maximum Life. ES Shield may get you some increased Spell Damage. Other Shields can roll Accuracy and Attack Speed, maybe even Reduced Physical Damage taken. |
|
| Min. requirements: +90 to Maximum Life +70% to Elemental Resistances Optional affixes: increased Attack Speed Accuracy Rating increased Spell Damage Block Chance Spell Block Chance Socketed Gems have #% increased Reservation Efficiency (Hunter Suffix) increased Elemental Damage with Attack Skills (Redeemer Prefix) |
|
 (Off-hand) Zeel's Amplifier - This Shield is often used by characters that favor 5-ways and Simulacrum. It has decent stats, and the increased AoE will affect KB's explosion radius. (Off-hand) Zeel's Amplifier - This Shield is often used by characters that favor 5-ways and Simulacrum. It has decent stats, and the increased AoE will affect KB's explosion radius. |
|
| +5% chance to Suppress Spell Damage (40-50)% increased Spell Damage +(60-80) to maximum Energy Shield +(50-70) to maximum Life 1% increased Area of Effect per Enemy killed recently, up to 50% You have Zealot's Oath if you haven't been hit recently |
|
 (Body Armour) Replica Hyrri's Ire - Lots of Damage and Spell Suppression, but not much else noteworthy. It can be good if you don't need anything else from a Rare Body Armour. (Body Armour) Replica Hyrri's Ire - Lots of Damage and Spell Suppression, but not much else noteworthy. It can be good if you don't need anything else from a Rare Body Armour. |
|
| (140-220)% increased Evasion Rating (12-18) to (231-347) Added Lightning Damage with Wand Attacks 25% increased Shock Duration on Enemies +(40-50) to Intelligence +30% chance to Suppress Spell Damage |
|
 (Body Armour) Rare Body Armour - There are god exotic mods from Conqueror's influences, but we recommend Eldritch mods and just the most basic defences. For the Eldritch mods, get Crit Multipleir for Attacks and a portion of Physical Damage taken as Elemental. (Body Armour) Rare Body Armour - There are god exotic mods from Conqueror's influences, but we recommend Eldritch mods and just the most basic defences. For the Eldritch mods, get Crit Multipleir for Attacks and a portion of Physical Damage taken as Elemental. |
|
| Min. requirements: +120 to maximum Life +60% to Elemental Resistances Optional affixes: Maximum Energy Shield Chance to Suppress Spell Damage |
|
| +(30-50) to Dexterity (140-180)% increased Evasion and Energy Shield 30% increased Movement Speed 10% increased Damage taken while Phasing You have Phasing if you've Killed Recently Projectiles Chain +1 times while you have Phasing Celestial Footprints |
|
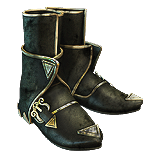 (Boots) Rare Boots - Movement Speed, Life, and Resistances. If you don't plan on constructing the complex Elusive/Taliwind/Onslaught Boots, get the Eldritch mod for Action Speed. (Boots) Rare Boots - Movement Speed, Life, and Resistances. If you don't plan on constructing the complex Elusive/Taliwind/Onslaught Boots, get the Eldritch mod for Action Speed. |
|
| Min. requirements: +90 to maximum Life 25% increased Movement Speed +70% to Elemental Resistances Optional affixes: chance to gain Onslaught for 4 seconds on Kill (Redeemer Suffix) chance to gain Elusive on Critical Strike (Redeemer Prefix) You have Tailwind if you have dealt a Critical Strike Recently (Hunter Suffix) Maximum Energy Shield Chance to Suppress Spell Damage |
|
 (Gloves) Rare Gloves - Gloves can roll Added Damage to Attack, increased Attack Speed, and Accuracy Rating. Try to gain these damage-oriented mods with maybe Dexterity and Resistances. For the Eldritch mods, get Pierce and Rage on Hit. (Gloves) Rare Gloves - Gloves can roll Added Damage to Attack, increased Attack Speed, and Accuracy Rating. Try to gain these damage-oriented mods with maybe Dexterity and Resistances. For the Eldritch mods, get Pierce and Rage on Hit. |
|
| Min. requirements: +90 to maximum Life 40% Total Elemental Resistances Optional affixes: Dexterity Accuracy Rating Added Elemental Damage to Attacks increased Attack Speed Maximum Energy Shield Chance to Suppress Spell Damage |
|
 (Belt) Prismweave - One of the best early-game items. It adds considerable amounts of Elemental Damage of all kinds to your Attacks, which is needed to gain Resonances. (Belt) Prismweave - One of the best early-game items. It adds considerable amounts of Elemental Damage of all kinds to your Attacks, which is needed to gain Resonances. |
|
| (12-24)% increased Global Physical Damage Adds (14-16) to (30-32) Fire Damage to Attacks Adds (10-12) to (24-28) Cold Damage to Attacks Adds 1 to (60-68) Lightning Damage to Attacks +(6-15)% to all Elemental Resistances 30% increased Elemental Damage with Attack Skills during any Flask Effect |
|
 (Belt) Headhunter - Usually, we don't mention the obvious T-0 Uniques, but this very much is a Headhunter-type build, and you should take advantage of that if the Belt is not too expensive. (Belt) Headhunter - Usually, we don't mention the obvious T-0 Uniques, but this very much is a Headhunter-type build, and you should take advantage of that if the Belt is not too expensive. |
|
| +(25-40) to maximum Life +(40-55) to Strength +(40-55) to Dexterity +(50-60) to maximum Life (20-30)% increased Damage with Hits against Rare monsters When you Kill a Rare monster, you gain its Modifiers for 60 seconds |
|
 (Belt) Rare Belt - Rare Belt will get you Strength, Maximum Life, Resistances, and increase your Elemental Damage with Attacks. Hunter-influenced Stygian Vise is the best. (Belt) Rare Belt - Rare Belt will get you Strength, Maximum Life, Resistances, and increase your Elemental Damage with Attacks. Hunter-influenced Stygian Vise is the best. |
|
| Min. requirements: +90 to maximum Life Strength increased Elemental Damage with Attack Skills +40% to Elemental Resistances Optional affixes: increased Maximum Life (Hunter Prefix) Gain a Flask Charge when you deal a Critical Strike (Hunter Prefix) increased Movement Speed during any Flask Effect (Hunter Suffix) |
|
 (Amulet) Yoke of Suffering - Yoke of Suffering is very good since you apply all three types of Elemental Ailments; it could be stronger if you find a way to Sap, Scorch, or Brittle. (Amulet) Yoke of Suffering - Yoke of Suffering is very good since you apply all three types of Elemental Ailments; it could be stronger if you find a way to Sap, Scorch, or Brittle. |
|
| +(10-16) to all Attributes +(10-20)% to Fire Resistance +(10-20)% to Cold Resistance +(20-40)% to Lightning Resistance 30% reduced Duration of Ailments on Enemies (5-10)% chance to Shock Enemies take (5-10)% increased Damage for each type of Ailment you have inflicted on them Your Elemental Damage can Shock |
|
 (Amulet) Rare Amulet - Amulet, besides Life and Resistances, can easily get you lots of Strength, Dexterity, Crit Chance, Crit Multiplier, add Damage of all Elemental types, and Accuracy. (Amulet) Rare Amulet - Amulet, besides Life and Resistances, can easily get you lots of Strength, Dexterity, Crit Chance, Crit Multiplier, add Damage of all Elemental types, and Accuracy. |
|
| Min. requirements: +90 to maximum Life 40% Total Elemental Resistances Optional affixes: Adds Elemental Damage to Attacks increased Elemental Damage with Attacks Global Critical Strike Multiplier increased Spell Damage Accuracy Rating |
|
| Recommended Anointments: Lethality Ash, Frost and Strom |
|
 (Ring) Nimis - Nimis causes your Projectiles to return to you, colliding with enemies on their way back. It's better than most Rings, but also very expensive. (Ring) Nimis - Nimis causes your Projectiles to return to you, colliding with enemies on their way back. It's better than most Rings, but also very expensive. |
|
| +(20-30)% to Lightning Resistance +(30-50) to Dexterity (25-35)% increased Projectile Damage Projectiles Return to you Projectiles are fired in random directions |
|
 (Ring) The Taming - Taming increases your damage by a lot. It's probably the second-best Ring damage-wise, at least when dealing with enemies that are difficult to slay. (Ring) The Taming - Taming increases your damage by a lot. It's probably the second-best Ring damage-wise, at least when dealing with enemies that are difficult to slay. |
|
| +(8-10)% to all Elemental Resistances (30-40)% increased Elemental Damage with Hits and Ailments for each type of Elemental Ailment on Enemy +(20-30)% to all Elemental Resistances 10% chance to Freeze, Shock and Ignite |
|
 (Ring) Death Rush - For a fast-paced playstyle, Death Rush is the most suitable Ring. It grants Adrenaline - 100% increased Damage, 25% increased Attack, Cast, and Movement Speed, and 10% additional Physical Damage Reduction. (Ring) Death Rush - For a fast-paced playstyle, Death Rush is the most suitable Ring. It grants Adrenaline - 100% increased Damage, 25% increased Attack, Cast, and Movement Speed, and 10% additional Physical Damage Reduction. |
|
| +(17-23)% to Chaos Resistance Recover (3-5)% of Life on Kill Gain Adrenaline for (1-3) seconds on Kill |
|
 (Ring) Rare Ring - Regular Rings are a good source of Life, Attributes, Resistances, added Damage, and Life on Kill or Life on Hit if your Life Recovery can't keep up. (Ring) Rare Ring - Regular Rings are a good source of Life, Attributes, Resistances, added Damage, and Life on Kill or Life on Hit if your Life Recovery can't keep up. |
|
| Min. requirements: +90 to maximum Life 40% Total Elemental Resistances increased Elemental Damage with Attacks Optional affixes: Adds Elemental Damage to Attacks Accuracy Rating increased Attack Speed Gain # Life per enemy Hit with Attacks |
|
 (Jewel) Rare Jewels - On your Jewels, try to get increased Maximum Life, missing Attributes, and Resistances. Life on Hit and ES on Hit will definitely be fitting. Attack Speed with Global Crit Multiplier are good for damage. (Jewel) Rare Jewels - On your Jewels, try to get increased Maximum Life, missing Attributes, and Resistances. Life on Hit and ES on Hit will definitely be fitting. Attack Speed with Global Crit Multiplier are good for damage. |
|
| Recommended affixes: Attributes Resistances Gain # Energy Shield per enemy Hit with Attacks (Cobalt) Gain # Life per Enemy Hit with Attacks (Crimson) increased Maximum Life increased Attack Speed with Wands Critical Strike modifiers Added Lightning Damage with Wand Attacks (Searching Abyss Jewels) |
|
 (Jewel) Large Cluster Jewel - Try to get a Spell Damage Large Cluster Jewel with increases to Spell Damage, or a Wand-themed Large Cluster Jewel with the basic damage notables. The 12-passive ones with the increased effect of small nodes can be good, but that's a big point commitment. (Jewel) Large Cluster Jewel - Try to get a Spell Damage Large Cluster Jewel with increases to Spell Damage, or a Wand-themed Large Cluster Jewel with the basic damage notables. The 12-passive ones with the increased effect of small nodes can be good, but that's a big point commitment. |
|
| Recommended affixes: 1 Added Passive Skill is Opportunistic Fusilade 1 Added Passive Skill is Martial Prowess 1 Added Passive Skill is Fuel the Fight 1 Added Passive Skill is Burden Projection 1 Added Passive Skill is Conjured Wall 1 Added Passive Skill is Sap Psyche |
|
 (Jewel) Medium Cluster Jewel - Critical Strike Medium Cluster Jewels with Pressure Points and Basics of Pain are probably the best choice. (Jewel) Medium Cluster Jewel - Critical Strike Medium Cluster Jewels with Pressure Points and Basics of Pain are probably the best choice. |
|
| Recommended affixes: 1 Added Passive Skill is Pressure Points 1 Added Passive Skill is Basics of Pain |
|
 (Jewel) Brutal Restraint - Brutal Restraint and Lethal Pride are both equally good, depending on whether you need Strength or Dexterity. Socketable near Insability or Infused. (Jewel) Brutal Restraint - Brutal Restraint and Lethal Pride are both equally good, depending on whether you need Strength or Dexterity. Socketable near Insability or Infused. |
|
| Denoted service of (500-8000) dekhara in the akhara of (Asenath-Balbala-Nasima) Passives in radius are Conquered by the Maraketh Historic |
|
 (Jewel) Watcher's Eye - Lightning Penetration and increased Critical Strike Chance are both Wrath's modifiers that you can find on a Watcher's Eye. You may also sport level-1 Clarity, Vitality, or Precision for their often matchless mods. (Jewel) Watcher's Eye - Lightning Penetration and increased Critical Strike Chance are both Wrath's modifiers that you can find on a Watcher's Eye. You may also sport level-1 Clarity, Vitality, or Precision for their often matchless mods. |
|
| (4-6)% increased maximum Energy Shield (4-6)% increased maximum Life (4-6)% increased maximum Mana <Two or Three random aura modifiers> |
|
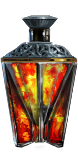 (Flask) Dying Sun - Used by many for the two additional Projectiles and increased Area of Effect. (Flask) Dying Sun - Used by many for the two additional Projectiles and increased Area of Effect. |
|
| +50% to Fire Resistance 20% less Fire Damage taken (125-150)% increased Charges per use (60-40)% less Duration (10-20)% increased Area of Effect during Effect Skills fire 2 additional Projectiles during Effect |
|
 (Flask) Bottled Faith - Increases overall Damage and creates Consecrated Ground on use. Use during boss fights. (Flask) Bottled Faith - Increases overall Damage and creates Consecrated Ground on use. Use during boss fights. |
|
| 40% increased Damage Creates Consecrated Ground on Use (30-15)% reduced Duration Consecrated Ground created by this Flask has Tripled Radius Consecrated Ground created during Effect applies (7-10)% increased Damage taken to Enemies (100-150)% increased Critical Strike Chance against Enemies on Consecrated Ground during Effect |
|
|
Other suggested Flasks:
|
|
   |
|
|
If you have any other build requests please leave that in the comments below. We are always open to suggestions and constructive feedback.
Pictures used in this article are the intellectual property of Grinding Gear Games.