Lightning Arrow
Deadeye Build
Updated for Path of Exile 2 Early Access
The Best Crafty Guides by Odealo
| Guide notes |
December 19, 2024
- Created for Early Access. |
| Build Overview |
| Tags: [RANGED] [ELEMENTAL] [LIFE] |
|
Budget:
Defenses:
|


|
Boss DPS:
AoE:
|


|
Lightning Damage Deadeye is currently one of the strongest archetypes. It deals mostly Converted Lightning and a bit of Cold Damage, so with high enough damage you will frequently Shock and Freeze. Conversion is sourced from Herlad Skills and your Active Skills, which are primarily Lightning Arrow and Lightning Rods. Lightning Arrow is a basic Attack that's good for clearing. Combined with Herald Skills and an automated Voltaic Mark, your clear speed is one of the highest in the game. Lightning Rods is, on the other hand, a much better skill against stationary targets, as it deals extremely high damage in the exact spot where the Rods are. These Rods don't just deal damage passively, you have to activate them. To do so, Hit them with a Chaining Lightning beam sourced from Orb of Lightning, which releases beams each time you yourself use a Lightning Skill, and Ball Lightning, which is Triggered when you Shock, so that you don't have to do anything but attack with your main damaging ability.
Pick Deadeye for Tailwind and Additional Projectile for all your Skills. Your damage heavily relies on additional Projectiles and Attack Speed. Try to keep a close distance from your enemies to get the damage bonus from Point Blank. Gathering Winds increases Evasion, makes you move, and attack faster. With high Evasion, Wind Ward becomes a great tool to mitigate the damage that you cannot Evade. Combine it with Wind Dancer to protect yourself from Melee Damage.
You can also check our other Path of Exile 2 builds right over here Odealo's Crafty Guides - Full List
1. Gameplay
Attacks with Lightning Arrow to slay regular enemies. Against bosses use your Lightning Rods with Orb of Storms (preferably two Orbs), and Ball Lightning, Triggered with Cast on Shock. Herald of Thunder and Herald of Ice will greatly increase your clear speed, but they do nothing against Bosses without additional, weaker Enemies to Trigger the on-kill effects. You can then automate your Voltaic Mark with Cast on Freeze. Occasionally, use Escape Shot to Escape or Freeze.
|
 
Odealo is a secure trading platform for MMO gamers. Here you can buy, sell, and trade PoE 2 Currency for real cash.
|
2. Build's PROS & CONS
| PROS |
- Very high damage against bosses
- One of the fastest builds for mapping
- High Evasion
|
| CONS |
- Fragile against damage that hits you
- Mana issues without Unique Ring
|
3. Leveling tips
Start with Lightning Arrow and Lightning Rods. it's similar to how you will play it later on. To activate Rods use Orb of Storms, you won't have enough Spirit and other resources for Ball Lightning that's cast on Shock until later on. Keep upgrading your Bow as you level up.
| [DPS] Lightning Arrow setup |
 |
Lightning Arrow - Sends a Lightning Arrow which will hit three additional enemies near its target with beams of lightning |
 |
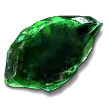
Martial Tempo - 25% more Attack Speed. |
 |
Innervate - Grants extra Physical as Lightning Damage, but only for 3 seconds after you kill a Shocked enemy with the Lightning Arrow. |
| [DPS] Lightning Rod setup |
 |
Lightning Rod - Fires Arrows that stay in the ground; you can then Hit the Rod with a Chaining beam from the Lightning Arrow and Orb of Storms. Use it against tough targets. |
 |
Concentrated Effect - Rods land in a concentrated area to maximize single-target damage. |
 |
Scattershot - Adds two additional Arrows, their quantity is crucial. |
| [UTILITY] Orb of Storms setup |
 |
Orb of Storms - It will target the Lightning Rods to activate them each time you use a Lightning Skill, which is Lightning Rod. Make sure to cast it over these Rods. |
 |
Magnified Effect - Increased AoE so that it's easier to Hit Rods. It's not required once you get good at it. |
 |
Chain - Adds one additional Chain to target one additional Rod per activation. |
| [UTILITY] other gems |
 |
Herald of Ice - Use it if you have enough Cold Damage to Freeze. If you don't, look for Added Cold Damage on your gear. |
 |
Herald of Thunder - Improves your damage and clear speed with Lightning Bolts. |
4. Final Skill Tree, Ascendancy Points, and Pantheon
Final Skill Tree:

|
|
Click on the image to open the Passive Tree preview in a new window
Or use the full browser version: Passive Tree
|
Ascendancy points:
Preferably in this order:
- Gathering Winds
- Point Blank
- Endless Munitions
- Wind Ward
5. Final Gems links
| [DPS] Lightning Arrow setup |
 |
Lightning Arrow - Sends a Lightning Arrow which will hit three additional enemies near its target with beams of lightning, making it great for clearing packs of mobs. |
 |
Cold Infusion - grants Extra Cold Damage but lowers other Damage types. It allows you to Freeze most Enemies without worrying about Cold Damage on your Bow or Quiver. |
 |
Martial Tempo - grants you a massive 25% more Attack Speed. |
 |
Ice Bite - this Support Gem grants you extra Physical as Cold Damage for 3 seconds after you Freeze an enemy, which greatly helps with Clear Speed. |
 |
Innervate - Grants extra Physical as Lightning Damage, but only for 3 seconds after you kill a Shocked enemy with the Lightning Arrow. |
 |
Mobility - You want to keep some of your Movement Speed while attacking. |
| [DPS] Lightning Rod setup |
 |
Lightning Rod - Fires Arrows that stay in the ground; you can then Hit the Rod with a Chaining beam from the Lightning Arrow, Ball Lightning, and Orb of Storms. It is your main source of Damage against Bosses. |
 |
Magnified Effect - improves AoE of Lightning Burst so they can easily overlap on a single Enemy. |
 |
Scattershot - Adds two additional Arrows, their quantity is crucial. |
 |
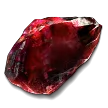
Conduction - improves your chances to inflict Shock, so you can trigger the Ball Lightning more often. |
 |
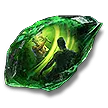
Primal Armament - It's 25% more Weapon Elemental Damage. |
 |
Close Combat - improves your Damage against Enemies in close range. |
| [UTILITY] Orb of Storms setup |
 |
Orb of Storms - It will target the Lightning Rods to activate them each time you use a Lightning Skill, which is Lightning Rod. Make sure to cast it over these Rods. |
 |
Chain - Adds one additional Chain to target one additional Rod per activation. |
 |
Unleash - You can summon two Orbs per Cast if you don't do it often, which you shouldn't. Requires Overabundance or else it will do nothing. |
 |
Overabundance - +1 to Maximum Orb of Storms. Overrides the one Orb limit, but reduces its Duration. |
 |
Persistence - Orb of Storms lasts longer. |
| [UTILITY] Herald of Ice setup |
 |
Herald of Ice - this Skill causes you to explode Frozen enemies on Kill, which deals Attack Damage to nearby Enemies, making it a great tool for clearing maps. |
 |
Elemental Focus - Inability to inflict Elemental Ailments, but more Elemental Damage. Herald cannot inflict Freeze on its own by default. |
 |
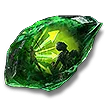
Cold Mastery - Increases Gem Level of Herald of Ice. |
 |
Longshot - Shattered enemies deal more damage when exploding if they're far from you. |
| [UTILITY] Herald of Thunder setup |
 |
Herald of Thunder - after Killing a Shocked Enemy your next two Attacks will trigger a Lightning Bolt that deals Attack Damage in a small radius. It can be triggered by any other Attack, even the Herald of Ice explosion. |
 |
Lightning Infusion - grants extra Lightning Damage. |
 |
Electrocute - allows you to inflict Electrocute Ailment, which causes Enemies to stop performing any action for a few seconds. |
 |
Neural Overload - makes Electrocuting Enemies easier. |
 |
Lightning Mastery - Increases Gem Level of Herald of Thunder. |
| [UTILITY] Cast on Shock setup |
 |
Cast on Shock - You should be able to Shock frequently to trigger the Ball Lightning Skill. You will need Thief's Torment to sustain the Mana Cost. |
 |
Ball Lightning - Its only purpose is to Hit Lightning Rods. Use a low-level Gem to reduce the Mana Costs, as the Damage is irrelevant here. |
 |
Impetus - Cast on Shock gains 40% increased Energy. |
 |
Energy Retention - 35% Chance to refund half of the Energy when the Skill is Triggered. |
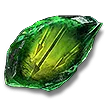 |
Deceleration - Ball Lightning moves slower, hovering over the rods for a bit longer. |
| [UTILITY] Cast on Freeze setup |
 |
Cast on Freeze - this Setup can be used to automatically Trigger Voltaic Mark during Mapping. If you don't have enough Spirit just cast it manually. Using a secondary Cast on Shock setup instead would drain your Mana too quickly. |
 |
Voltaic Mark - Voltaic Mark is used for a 50% more Shock Chance and a 30% increased effect of Shock. During mapping, it also deals AoE damage which definitely helps. |
| [UTILITY] Escape Shot setup |
 |
Escape Shot - The only Cold Attack you use yourself. Use it to escape enemies that pose a danger to you. You can also use it to Freeze enemies and trigger Voltaic Mark. |
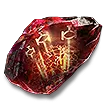 |
Holy Descent - Creates Consecrated Ground, which halves the Curse Effect and grants Life Regeneration. |
| [UTILITY] Wind Dancer setup |
 |
Wind Dancer - A protective Persistent Buff that grants you more Evasion. Upon being Hit with a Melee Attack it knocks enemies back and Triggers Gale Force. |
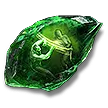 |
Blind - It also Blinds enemies on Hit, making you more likely to Evade Attacks. |
 |
Maim - ensures Hit Enemies will be also Maimed, which slows down their Movement Speed. |
|
 
On Odealo dozens of sellers compete for your attention. Buying PoE Currency here guarantees the best prices, prompt delivery, and the best quality of service.
|
6. Gear Setup
You don't need any Unique Items except Thief's Torment to get Mana on Hit. On your Bow and Quiver look for high Physical Damage with Attack Speed, Gem Level for Projectile Skills, and Added Cold Damage to Freeze enemies more easily. To host all the Persistent Buffs you will need some extra Spirit, but if you are short on budget you can manually swap them around depending on the content you are running. Dexterity and Intelligence are required to equip skills and equipment.
|
Stat priorities on items:
- Physical DPS
- Evasion Rating
- Level of Projectile Skills
- Maximum Life
- Elemental Resistances
- Attribute Requirements
- Spirit
- Life and Mana on Kill
|
 (Weapon) Rare Bow - use a Rare Bow with the highest DPS you can find, make sure to use a Dualstring Bow to fire an additional Projectile with your every Attack. Full Physical Bows can achieve the highest DPS, but having plenty of Cold Damage will greatly help with Freezing Enemies, which is very valuable for Clear Speed and defense. (Weapon) Rare Bow - use a Rare Bow with the highest DPS you can find, make sure to use a Dualstring Bow to fire an additional Projectile with your every Attack. Full Physical Bows can achieve the highest DPS, but having plenty of Cold Damage will greatly help with Freezing Enemies, which is very valuable for Clear Speed and defense. |
Min. requirements:
Bow Attacks fire an additional Arrow
200+ DPS
Optional affixes:
Adds # Cold Damage
# to Level of all Projectile Skills
#% reduced Attribute Requirements |
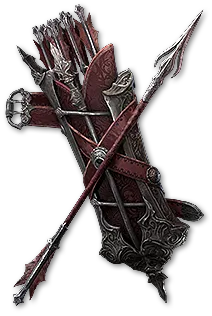 (Quiver) Rare Quiver - the Quiver is not as impactful as the Bow, but you will nearly double every modifier it grants, so it is also important. Look for flat Damage for Attacks, increased Damage with Bows, Attack Speed, or Arrow Speed. It is also a great source of Dexterity, which you will need a lot. (Quiver) Rare Quiver - the Quiver is not as impactful as the Bow, but you will nearly double every modifier it grants, so it is also important. Look for flat Damage for Attacks, increased Damage with Bows, Attack Speed, or Arrow Speed. It is also a great source of Dexterity, which you will need a lot. |
Min. requirements:
40% increased Damage with Bow Skills
Adds 20 Cold Damage to Attacks
+25 to Dexterity
Optional affixes:
Adds # Physical/Fire/Lightning Damage to Attacks
# to Level of all Projectile Skills
% increased Attack Speed
% increased Projectile Speed
% chance to Pierce an Enemy |
 (Ring) Thief's Torment - this Ring is necessary to unleash the full potential of Lightning Rods, as it grants you insane Life and Mana sustain. Using Cast on Shock Setup without it is impossible. (Ring) Thief's Torment - this Ring is necessary to unleash the full potential of Lightning Rods, as it grants you insane Life and Mana sustain. Using Cast on Shock Setup without it is impossible. |
+(120–160) to Accuracy Rating
(30–40)% increased Rarity of Items found
+(10–15)% to all Elemental Resistances
Gain 25 Life per Enemy Hit with Attacks
Can't use other Rings
Gain 15 Mana per Enemy Hit with Attacks
50% reduced Duration of Curses on you |
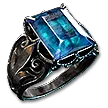 (Ring) Rare Ring - at first use Rare Rings that grant you a lot of Life, Mana, and Mana Regeneration. It is a temporary choice until you can use the Thief's Torment, so don't rely on them to cap your Resistances or Attributes. (Ring) Rare Ring - at first use Rare Rings that grant you a lot of Life, Mana, and Mana Regeneration. It is a temporary choice until you can use the Thief's Torment, so don't rely on them to cap your Resistances or Attributes. |
Min. requirements:
+(10–15)% to all Elemental Resistances
+80 to maximum Life
+100 to maximum Mana
60% increased Mana Regeneration Rate
Optional affixes:
Adds # Physical/Fire/Lightning Damage to Attacks |
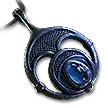 (Amulet) Rare Amulet - use a Rare Amulet to fix your Resistance and Attribute Requirements. It should also provide maximum Life. To activate all Spirit Skills you will need 50 extra Spirit on your Amulet and Body Armour combined. Without it, you will need to manually change your setups, which is annoying, but doesn't break the Build. (Amulet) Rare Amulet - use a Rare Amulet to fix your Resistance and Attribute Requirements. It should also provide maximum Life. To activate all Spirit Skills you will need 50 extra Spirit on your Amulet and Body Armour combined. Without it, you will need to manually change your setups, which is annoying, but doesn't break the Build. |
Min. requirements:
+80 to maximum Life
+50 total Elemental and Chaos Resistance
+30 total Attributes
Optional affixes:
+# to Spirit
+# to Level of all Projectile Skills |
 (Body Armour) Rare Armour - your Body Armour is your main source of Evasion Rating. You will also need a solid amount of maximum Life. Other than that look for Resistance, Attributes, or Spirit. (Body Armour) Rare Armour - your Body Armour is your main source of Evasion Rating. You will also need a solid amount of maximum Life. Other than that look for Resistance, Attributes, or Spirit. |
Min. requirements:
+140 to maximum Life
+800 Evasion Rating
Optional affixes:
+# to Spirit
Elemental and Chaos Resistance
Attributes |
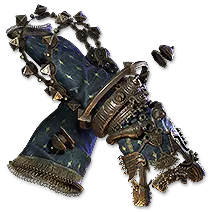 (Gloves) Kitoko's Current - those Gloves slightly lower your Attack Speed, but allow you to Electrocute all Enemies reliably, which is a major defensive boost against Bosses. (Gloves) Kitoko's Current - those Gloves slightly lower your Attack Speed, but allow you to Electrocute all Enemies reliably, which is a major defensive boost against Bosses. |
(30–50)% increased Energy Shield
+(10–20) to Dexterity
(10–15)% reduced Attack and Cast Speed
Lightning damage from Hits Contributes to Electrocution Buildup |
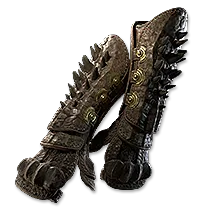 (Gloves) Rare Gloves - you can use a pair of Rare Gloves that grants you a lot of maximum Life, Resistance, and Attributes. It may also boost your Damage a bit. (Gloves) Rare Gloves - you can use a pair of Rare Gloves that grants you a lot of maximum Life, Resistance, and Attributes. It may also boost your Damage a bit. |
Min. requirements:
+100 to maximum Life
+50 total Elemental and Chaos Resistance
Optional affixes:
% increased Attack Speed
Attributes
Added Damage to Attacks |
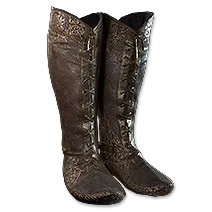 (Boots) Rare Boots - it is mandatory to have a 30% increased Movement Speed on your Boots. Other than that look for maximum Life, Resistance, and Attributes. (Boots) Rare Boots - it is mandatory to have a 30% increased Movement Speed on your Boots. Other than that look for maximum Life, Resistance, and Attributes. |
Min. requirements:
+30% increased Movement Speed
+100 to maximum Life
+40 total Elemental and Chaos Resistance
Optional affixes:
Attributes |
 (Helmet) Rare Helmet - another defensive slot, you will mainly look for maximum Life, Resistance, and Attributes. You can also get a bit of Energy Shield if you have enough Attributes to wear it. (Helmet) Rare Helmet - another defensive slot, you will mainly look for maximum Life, Resistance, and Attributes. You can also get a bit of Energy Shield if you have enough Attributes to wear it. |
Min. requirements:
+120 to maximum Life
+50 total Elemental and Chaos Resistance
Optional affixes:
Attributes
Energy Shield |
 (Belt) Rare Belt - you can look for additional Charm slots to deal with more Ailment types, but you should mainly focus on the usual defense. (Belt) Rare Belt - you can look for additional Charm slots to deal with more Ailment types, but you should mainly focus on the usual defense. |
Min. requirements:
+150 to maximum Life
+50 total Elemental and Chaos Resistance
Optional affixes:
Strength
+# Charm Slot |
 (Jewel) Rare Jewel - there are a lot of useful modifiers on your Jewels. The extra effect of your Quiver modifier is the most potent one, but it is also the most expensive, so you might opt for one that has weaker modifiers but in higher quantity. (Jewel) Rare Jewel - there are a lot of useful modifiers on your Jewels. The extra effect of your Quiver modifier is the most potent one, but it is also the most expensive, so you might opt for one that has weaker modifiers but in higher quantity. |
Optional affixes:
% increased bonuses gained from Equipped Quiver
% increased Attack/Elemental/Lightning Damage
% increased Damage with Bows
% increased Attack Speed
% increased Attack Speed with Bows
Damage Penetrates (5–10)% Lightning Resistance
% increased Movement Speed |
| |
|
 
Odealo is one of the biggest Path of Exile marketplaces. It allows regular players to buy, sell, and trade PoE Currency with the use of real cash
|
If you have any other build requests please leave that in the comments below. We are always open to suggestions and constructive feedback.
Pictures used in this article are the intellectual property of Grinding Gear Games.



 (Weapon) Rare Bow - use a Rare Bow with the highest DPS you can find, make sure to use a Dualstring Bow to fire an additional Projectile with your every Attack. Full Physical Bows can achieve the highest DPS, but having plenty of Cold Damage will greatly help with Freezing Enemies, which is very valuable for Clear Speed and defense.
  (Quiver) Rare Quiver - the Quiver is not as impactful as the Bow, but you will nearly double every modifier it grants, so it is also important. Look for flat Damage for Attacks, increased Damage with Bows, Attack Speed, or Arrow Speed. It is also a great source of Dexterity, which you will need a lot.
  (Ring) Thief's Torment - this Ring is necessary to unleash the full potential of Lightning Rods, as it grants you insane Life and Mana sustain. Using Cast on Shock Setup without it is impossible.
  (Ring) Rare Ring - at first use Rare Rings that grant you a lot of Life, Mana, and Mana Regeneration. It is a temporary choice until you can use the Thief's Torment, so don't rely on them to cap your Resistances or Attributes.
  (Amulet) Rare Amulet - use a Rare Amulet to fix your Resistance and Attribute Requirements. It should also provide maximum Life. To activate all Spirit Skills you will need 50 extra Spirit on your Amulet and Body Armour combined. Without it, you will need to manually change your setups, which is annoying, but doesn't break the Build.
  (Body Armour) Rare Armour - your Body Armour is your main source of Evasion Rating. You will also need a solid amount of maximum Life. Other than that look for Resistance, Attributes, or Spirit.
  (Gloves) Kitoko's Current - those Gloves slightly lower your Attack Speed, but allow you to Electrocute all Enemies reliably, which is a major defensive boost against Bosses.
  (Gloves) Rare Gloves - you can use a pair of Rare Gloves that grants you a lot of maximum Life, Resistance, and Attributes. It may also boost your Damage a bit.
  (Boots) Rare Boots - it is mandatory to have a 30% increased Movement Speed on your Boots. Other than that look for maximum Life, Resistance, and Attributes.
  (Helmet) Rare Helmet - another defensive slot, you will mainly look for maximum Life, Resistance, and Attributes. You can also get a bit of Energy Shield if you have enough Attributes to wear it.
  (Belt) Rare Belt - you can look for additional Charm slots to deal with more Ailment types, but you should mainly focus on the usual defense.
 (Jewel) Rare Jewel - there are a lot of useful modifiers on your Jewels. The extra effect of your Quiver modifier is the most potent one, but it is also the most expensive, so you might opt for one that has weaker modifiers but in higher quantity.