Fissure Totems
Warbringer Build
Updated for Path of Exile 2 Early Access
The Best Crafty Guides by Odealo
| Guide notes |
October 4, 2025
- Created for Early Access. |
| Build Overview |
| Tags: [ATTACK] [TOTEM] [ELEMENTAL] [LIFE] |
|
Budget:
Defenses:
|


|
Boss DPS:
AoE:
|

|
The build revolves around re-triggering Fissures to deal damage. Molten Fissures are ground effects created, in this build, by Forge Hammer (after using a Warcry near the Hammer) and Volcanic Fissure. These Fissures release an Aftershock with the damage of the originating Skill each time they're slammed with any other Skill, so to slam them with the highest frequency, we will use Totems alongside our default attacks. Shockwave Totem is the only option for a Totem. For the character, it's Volcanic Fissure with Leap Slam, to keep it simple. The Warcries which we can activate our Hammer with are Ancestral Cry, to enter the Kaom form for a moment, and Infernal Cry, to Empower the next few Attacks with extra Fire Damage. That will cause us to deal mainly Fire Attack Damage, improved with Rage, War Banner, and sources of reductions to Fire Resistance of the enemies.
For the ascendancy pick Warbringer. It has the Answered Call for +1 Max Totem with Ancestral Spirits, the Wooden Wall that redirects 20% of damage to be taken from Totems first, and Jade Heritage that reduces Physical Damage Taken. Warcaller's Bellow may be taken to explode corpses and ignore Warcries' Cooldowns, or alternatively, Renly's Training for extra Block Chance. We may even allocate the Anvil's Weight, get some Armour Break, and allocate The Molten One's Gift notable to benefit from Breaking Armour with Fire Damage. The Totem Branch is what's most important, and why other ascendancies are worse. We will follow up with the Avatar of Fire to Convert the rest of the Physical Damage to Fire, Giant's Blood to wield a big Mace (optional), and Blood Magic to never worry about Mana again. This results in a very tanky character that Blocks half of the hits, prevents and shifts most of the damage taken, and has lots of Life with good Life Recovery. It also benefits from Ancestral Spirits' buffs, all of which are very good.
You can also check our other Path of Exile 2 builds right over here Odealo's Crafty Guides - Full List
1. Gameplay
The build uses Volcanic Fissure and Shockwave Totems for mapping. This'll be good enough to slay small foes, but for the big ones, be sure to activate the Forge Hammer with a Warcry, or better yet, two Warcries, and place the Banner down. Then, continue to smack the ground below you. Leap Slam is designed to close the gaps. Other skills are persistent buffs.
|
 
Odealo is a secure trading platform for MMO gamers. Here you can buy, sell, and trade PoE 2 Currency for real cash.
|
2. Build's PROS & CONS
| PROS |
- high durability, the build is able to withstand devastating single hits
- easy to assemble, even on SSF; requires simple items
|
| CONS |
- mediocre clear speed and damage
|
3. Leveling tips
Begin as all warriors do, with Rolling Slam, Earthquake, and Boneshatter. Prime your enemies for Boneshatter linked to Impact Shockwave, and execute them with it. Start using Shockwave Totem as soon as it's available. It will supplement your damage. Once you unlock Forge Hammer and Volcanic Fissure, you can start following this guide. Be sure to have two weapon sets, one for a Mace with Shield and another one for a 2-hand Mace (you're not allocating Giant's Blood when levelling).
4. Final Skill Tree, Ascendancy Points, and Pantheon
Final Skill Tree:

|
|
Click on the image to open the Passive Tree preview in a new window
Or import the build into PoB:
Path of Building 2 code
|
Ascendancy points:
Preferably in this order:
- Answered Call
- Anvil's Weight
- Jade Heritage
- Wooden Wall
5. Final Gems links
| [DPS] Forge Hammer setup |
 |
Forge Hammer - Throw a Hammer at your foe and use a Warcry to create a big Volcanic Fissure around it. Its Fissure is the strongest. |
 |
Fist of War |
 |
Elemental Armament |
 |
Fire Penetration |
 |
Fire Attunement |
 |
Rageforged |
| [UTILITY] Ancestral Spirits setup |
 |
Ancestral Spirits - Spirits that are summoned at random when you place down a Totem. They are utility-oriented; they deal little to no damage. The Skill comes from the Answered Call ascendancy node. |
 |
Maim |
 |
Blind - Can be replaced with Brutus' Brain. |
 |
Culling Strike |
 |
Fire Exposure |
 |
Infernal Legion |
| [UTILITY] Shockwave Totem setup |
 |
Shockwave Totem - A Slamming Totem. Its role is to Attack Fast; the actual damage of the Fissure is not tied to the Slam that Triggers it, but the Slam it is created by. |
 |
Urgent Totems |
 |
Overabundance |
 |
Rapid Attacks |
 |
Font of Blood - It can be replaced with Tawhoa's Tending if your Totems are bulky. |
 |
Magnified Area |
| [UTILITY] Infernal Cry setup |
 |
Infernal Cry - Lots of Physical Damage as Extra Fire Damage, depending on nearby enemies' Power. Use it against bosses or in crowds, where its secondary effect will cause affected foes to explode on death. |
 |
Cooldown Recovery - If you have Warcaller's Bellow allocated, replace it with Mobility. |
 |
Raging Cry |
|
Rageforged |
|
Magnified Area |
 |
Tireless |
| [UTILITY] Ancestral Cry setup |
 |
Ancestral Cry - A Warcry that requires 100 Glory to use. It makes your character stronger for 8 seconds. It's useful mainly for mapping when it causes your Steps to deal Fire Damage. Volcanic Steps count as Slams, so they can activate Shockwave Fissures. |
 |
Corrupting Cry - Replace with Prolonged Duration if your Strength is low. |
 |
Efficiency |
 |
Second Wind |
|
Fire Exposure |
| [DPS] Volcanic Fissure setup |
 |
Volcanic Fissure - It creates and reactivates Fissures. Keep Slamming them with the same skill repeatedly. It's important to make this skill feel comfortable to use when mapping, with means like lowering its cost or increasing its AOE, but this setup leans towards making it a good supplementary skill for boss fights. |
|
Elemental Armament |
 |
Rage |
|
Fire Attunement |
|
Rageforged |
 |
Armour Explosion |
| [MOBILITY] Leap Slam setup |
 |
Leap Slam - It's used to crash into enemies. With Crater and Holy Descent, you'll start the encounter with the upper hand. |
|
Rapid Attacks |
 |
Holy Descent |
 |
Crater |
|
Rage |
| [UTILITY] Berserk setup |
 |
Berserk - Drains your Life, but improves the effect of Rage. If you have especially low Life Recovery, you may not be able to benefit from it. |
 |
Vitality |
| [UTILITY] Encased in Jade setup |
 |
Encased in Jade - Don't activate it, just keep the passive bonus. It Reduces Physical Damage Taken. It comes from the Jade Heritage ascendancy passive. |
 |
Prolonged Duration |
| [UTILITY] War Banner setup |
 |
War Banner - Requires 200 Glory to Use. Creates an Area inside of which you deal More Damage, have More Attack Speed, and more Accuracy. |
 |
Daresso's Passion |
|
Prolonged Duration |
|
Magnified Area |
 |
Expanse |
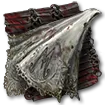
| [UTILITY] Scavenged Plating setup |
 |
Scavenged Plating - With Anvil's Weight (optional ascendancy passive) you'll Break a lot of Armour. Scavenged Plating will then boost your own Armour significantly. If you don't have that passive, or your Armour is low, replace it with Time of Need. |
|
Prolonged Duration |
 |
Physical Mastery |
 |
Cannibalism |
|
On Odealo dozens of sellers compete for your attention. Buying PoE Currency here guarantees the best prices, prompt delivery, and the best quality of service.
|
6. Gear Setup
Gearing up is simple. It's mostly Life, Armour, and Strength. Armour should also be employed to affect Elemental Damage via mods found commonly on Rare Armour gear. Not much else is needed, not even Spirit is as valuable as in other builds. Life Recovery comes from Life on Kill, which can also be accessed with Cannibalism Support, and a Life Flask. It will be important to get enough Accuracy. Uniques are not mandatory at all, but some of the expensive ones, like Astramentis, Chernobog's Pillar, or Svallin, would, of course, be great. But that's not specific to this build; you will manage without them. For a Weapon, pick a Mace with high damage. If you can, prioritise Physical Damage over Fire Damage, as it's a source of Fire Damage.
|
Stat priorities on items:
- Maximum Life
- Resistances
- Strength
- Armour
- Armour also applies to Elemental Damage
- Chaos Resistance
- Level of all Attack Skills
- Added Physical Damage
- Life Recovery
- Spirit
- Added Physical Damage
|
 (Helmet) Rare Helmet - On a Helmet, aim for Maximum Life, Resistances, Strength, and Armour. There is nothing else worth your attention. (Helmet) Rare Helmet - On a Helmet, aim for Maximum Life, Resistances, Strength, and Armour. There is nothing else worth your attention. |
Min. requirements:
Elemental or Chaos Resistance
Maximum Life
Strength
Optional affixes:
Armour
#% of Armour also applies to Elemental Damage |
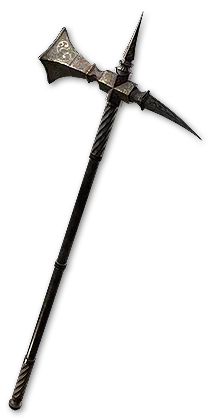 (Weapon) Rare Mace - Mace needs high Physical DPS and Levels for all Melee Skills. Two-hander, available with Giant's Blood, yields much better results, but you'll probably need a lot of investment to justify allocating it. Start with a single-hand Mace and never give up your Shield, no matter what. (Weapon) Rare Mace - Mace needs high Physical DPS and Levels for all Melee Skills. Two-hander, available with Giant's Blood, yields much better results, but you'll probably need a lot of investment to justify allocating it. Start with a single-hand Mace and never give up your Shield, no matter what. |
Min. requirements:
+# to Level of all Melee Skills
high Physical DPS
increased Attack Speed
increased Elemental Damage with Attacks
Optional affixes:
Added Fire Damage
Accuracy Rating
Gain #% of Damage as Extra # Damage
Chance of gaining Onslaught on Killing Hits with this Weapon |
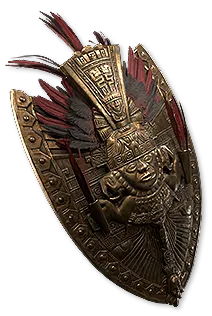 (Off-hand) Rare Shield - Shield is here for defensive stats, mainly Block Chance, which, remember, is now capped at 50%. If you have Renly's Training, you won't need Block Chance here. (Off-hand) Rare Shield - Shield is here for defensive stats, mainly Block Chance, which, remember, is now capped at 50%. If you have Renly's Training, you won't need Block Chance here. |
Min. requirements:
high Block Chance
Elemental or Chaos Resistance
Maximum Life
Optional affixes:
Strength
Armour
#% of Armour also applies to Elemental Damage
additional Physical Damage Reduction |
 (Off-hand) Chernobog's Pillar - Chernobog's Pillar fits here perfectly, but its Block Chance is low, so you'll need to gather it from the Skill Tree. It grants a lot of damage. (Off-hand) Chernobog's Pillar - Chernobog's Pillar fits here perfectly, but its Block Chance is low, so you'll need to gather it from the Skill Tree. It grants a lot of damage. |
(100–150)% increased Armour
+(30–40)% to Fire Resistance
+(23–29)% to Chaos Resistance
+(150–200) to Stun Threshold
Gain 1% of damage as Fire damage per 1% Chance to Block |
 (Gloves) Rare Gloves - Gloves are one of the more important gear pieces. Other than the regular defensive stats, they can roll Level of all Attack Skills, Attack Speed, Added Damage, and Accuracy. (Gloves) Rare Gloves - Gloves are one of the more important gear pieces. Other than the regular defensive stats, they can roll Level of all Attack Skills, Attack Speed, Added Damage, and Accuracy. |
Min. requirements:
Maximum Life
+# to Level of all Attack Skills
Elemental or Chaos Resistance
Optional affixes:
increased Attack Speed
Armour
#% of Armour also applies to Elemental Damage
Adds # Physical Damage to Attacks
Gain Life per Enemy Killed
Accuracy Rating |
 (Boots) Rare Boots - Boots need increased Movement Speed, around 30%, in addition to Maximum Life, Armour, and all that. (Boots) Rare Boots - Boots need increased Movement Speed, around 30%, in addition to Maximum Life, Armour, and all that. |
Min. requirements:
increased Movement Speed
Elemental or Chaos Resistance
Maximum Life
Optional affixes:
Armour
#% of Armour also applies to Elemental Damage
100% increased effect of Socketed Items (Essence Suffix) |
 (Amulet) Rare Amulet - Amulets are often prized for Spirit, but here, we don't really need a lot of it, so shift your focus to Level of all Melee Skills, Maximum Life, Resistances, and Attributes. (Amulet) Rare Amulet - Amulets are often prized for Spirit, but here, we don't really need a lot of it, so shift your focus to Level of all Melee Skills, Maximum Life, Resistances, and Attributes. |
Min. requirements:
+# to Level of all Melee Skills
Maximum Life
Optional affixes:
Attributes
Spirit
Elemental or Chaos Resistance
increased Armour from Equipped Body Armour (desecrated Prefix) |
 (Ring) Rare Ring - Rings will get you Life, Resistances, Attributes such as Strength, and Added Physical Damage to Attacks. It's the best opportunity to gather Chaos Resistance, present as an implicit on Amethyst Rings. (Ring) Rare Ring - Rings will get you Life, Resistances, Attributes such as Strength, and Added Physical Damage to Attacks. It's the best opportunity to gather Chaos Resistance, present as an implicit on Amethyst Rings. |
Min. requirements:
Elemental or Chaos Resistance
Maximum Life
Optional affixes:
Adds Physical Damage to Attacks
Attributes
increased Fire Damage |
 (Belt) Rare Belt - On a Belt, you can easily roll Strength, Armour, Maximum Life, and Resistances. Try to get all that. (Belt) Rare Belt - On a Belt, you can easily roll Strength, Armour, Maximum Life, and Resistances. Try to get all that. |
Min. requirements:
Maximum Life
Elemental or Chaos Resistance
Optional affixes:
Armour
Strength |
 (Body Armour) Rare Body Armour - Yet another opportunity to get a lot of Life, Resistances, and preferably Armour with the "#% of Armour also applies to Elemental Damage" mod. There's also Spirit. (Body Armour) Rare Body Armour - Yet another opportunity to get a lot of Life, Resistances, and preferably Armour with the "#% of Armour also applies to Elemental Damage" mod. There's also Spirit. |
Min. requirements:
Maximum Life
Armour
Optional affixes:
Elemental or Chaos Resistance
#% of Armour also applies to Elemental Damage
Spirit
Hits against you have #% reduced Critical Damage Bonus (Essence Suffix) |
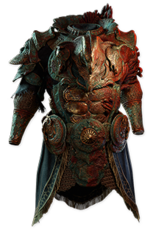 (Body Armour) Titanrot Cataphract - It has lots of Armour and increases your Strength by up to 30%, maybe more when Corrupted. It can be good if you struggle with the requirement imposed by Giant's Blood. (Body Armour) Titanrot Cataphract - It has lots of Armour and increases your Strength by up to 30%, maybe more when Corrupted. It can be good if you struggle with the requirement imposed by Giant's Blood. |
(400–500)% increased Armour
(15–30)% increased Strength
10% reduced Dexterity
10% reduced Intelligence
You have no Life Regeneration |
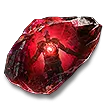
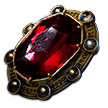 (Jewel) Rare Jewels - On Rubies, you can find some potent Rage-generating mods, some basic Fire Damage, Fire Penetration, and Totem mods, be it for damage, survivability, or placement speed. (Jewel) Rare Jewels - On Rubies, you can find some potent Rage-generating mods, some basic Fire Damage, Fire Penetration, and Totem mods, be it for damage, survivability, or placement speed. |
Optional affixes:
Damage Penetrated #% Fire Resistance
Gain Rage on Melee Hit
Gain Rage when Hit by an Enemy
increased Fire/Elemental Damage
increased Attack Damage
Totem modifiers |
|
Odealo is one of the biggest Path of Exile marketplaces. It allows regular players to buy, sell, and trade PoE Currency with the use of real cash
|
If you have any other build requests please leave that in the comments below. We are always open to suggestions and constructive feedback.
Pictures used in this article are the intellectual property of Grinding Gear Games.